In this tutorial, I will give an overview of how to use YAML in Azure Pipelines.
Azure Pipelines is a service which provides CI (Continuous Integration) and CD (Continuous Delivery). It can integrate with various repositories like GitHub, GitHub Enterprise, BitBucket or even Azure Repositories for source code.
Continuous Integration (CI) is a process which automatically starts the server side build, the moment any team member checks-in or commits the code to source control. The build can be automated and deployed to Microsoft Azure and tested.
A common way to create and configure your build and release pipelines in the web portal is by using the classic editor. Though Azure Pipelines can work with a classic editor (formerly called as vNext – which is GUI based), I am going to show how YAML can be used.
In this article, I will discuss:
- the basics of YAML
- how to use it with Azure Pipelines and
- how it can be used for configuring CI-CD pipelines in Azure DevOps.
You may have heard of “Configuration as Code”. YAML makes it possible to code your configuration management by defining build and release pipelines in the YAML code.
YAML Overview
YAML stands for (YAML Ain’t Markup Language). It is a human friendly serialization language mainly used for configuration files. It can also be used for storing debugging output or document headers. It has a very limited syntax. It started with the reference as Yet another markup language, before it got the current YAML Ain’t Markup Language.
The following conventions are followed when you want to create yml file:
Remember that you cannot use tab as indentation, but can add space for indentation.
In order to work with Azure Pipelines, we need to have the source code we will use to create a build. For build creation, we need to have an agent to do the job. The same agent can also be used to deploy and test after deployment.
An agent can either be installed on a machine on-premises (self-hosted) or used from Microsoft-hosted agents. This agent is responsible for running one job at a time, after communicating with Azure Pipelines as to which job to run. It will also determine system capabilities like name of the machine, OS, or take care of special installations. It will also create logs after the job is over.
I will first use the hosted agent, and later show how your own agent and pool can be configured and used.
Create and work with our own Azure Pipelines
I will use GitHub as source control, use build in Azure DevOps with YAML and deploy to Azure Web App Service.
Pre-requisites: GitHub account with at least 1 repository.
Let us see a walkthrough of the same to use CI CD service with Azure Pipelines. In order to get Azure Pipelines, use this link.
Note: Figure 1 contains two buttons. Even if you use the button ‘Start free with Pipelines’, you can later connect to GitHub for source control.
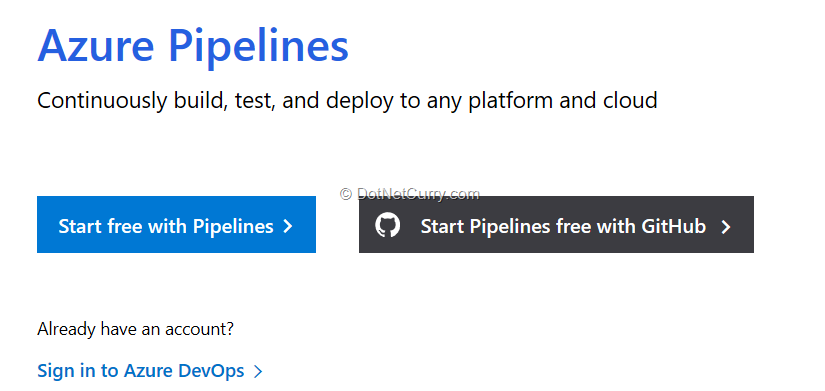
Figure 1: Create Azure Pipelines
Connect to Azure DevOps or Create a new Organization with Azure Pipelines
After clicking on the link, use any of your Microsoft Accounts to work with Azure Pipelines. You will be asked to continue to work with Azure DevOps and automatically a new account (organization) will be created for you. If you already have an Azure DevOps account, you can work with that.
Now that we have Azure DevOps Account, we can create a Team Project. A Team Project can be based on process as Basic, Agile, Scrum or CMMI. I have selected Scrum here (selecting the process will not make any difference to build and release pipelines, I selected Scrum for demonstration purpose, but feel free to choose any other).
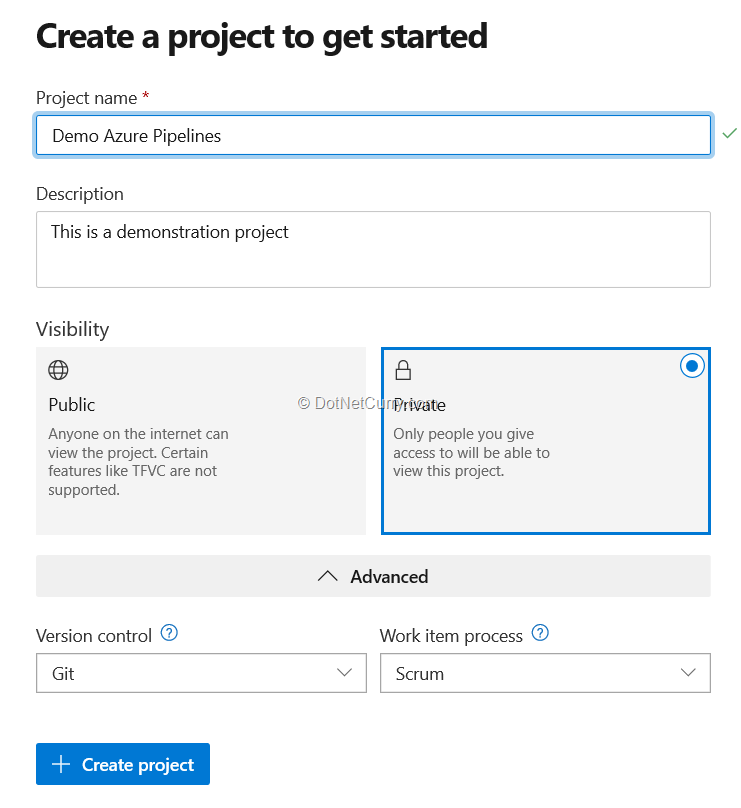
Figure 2: Create Team Project in your organization
Now that we have created a Team Project, we need to create a Build Pipeline. Select Pipelines – Builds and click on the New Pipeline button. Now provide the source of our code (GitHub in this case), along with the authentication to connect to the required repository ( GitHub in this case).
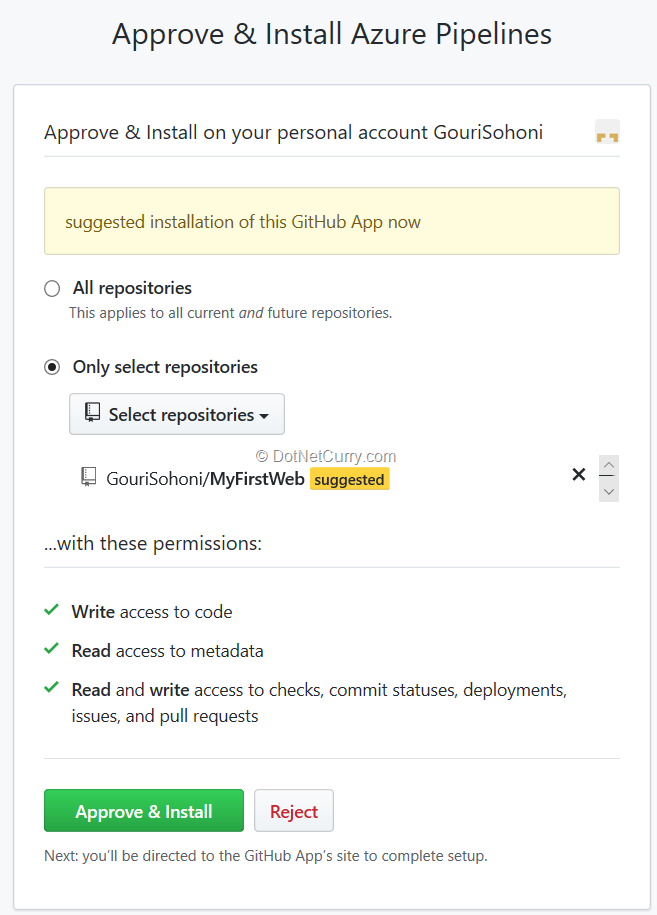
Figure 3: Authenticate and integrate with GitHub
When you are providing GitHub a connection to a Public repository, you will get a warning that you are trying to connect to Public repo from a Private one (assuming your Azure DevOps repo is Private). The moment you add the repository, you will get suggestions for the template for build as follows (the template is suggested based on the code- Java, .Net etc)
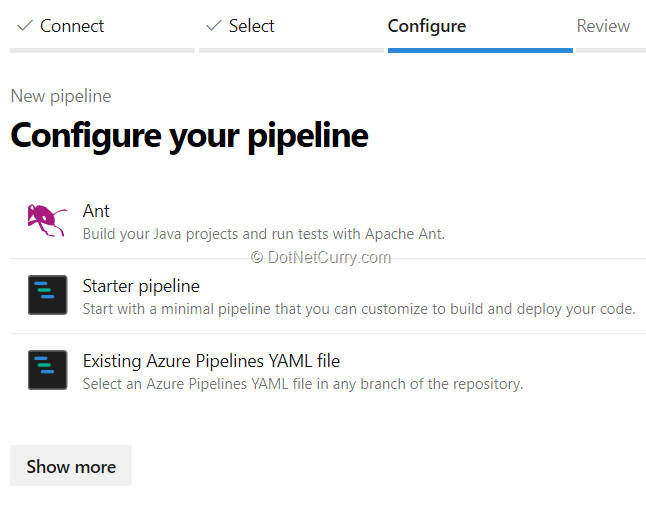
Figure 4: Build Pipelines which suggests Ant template
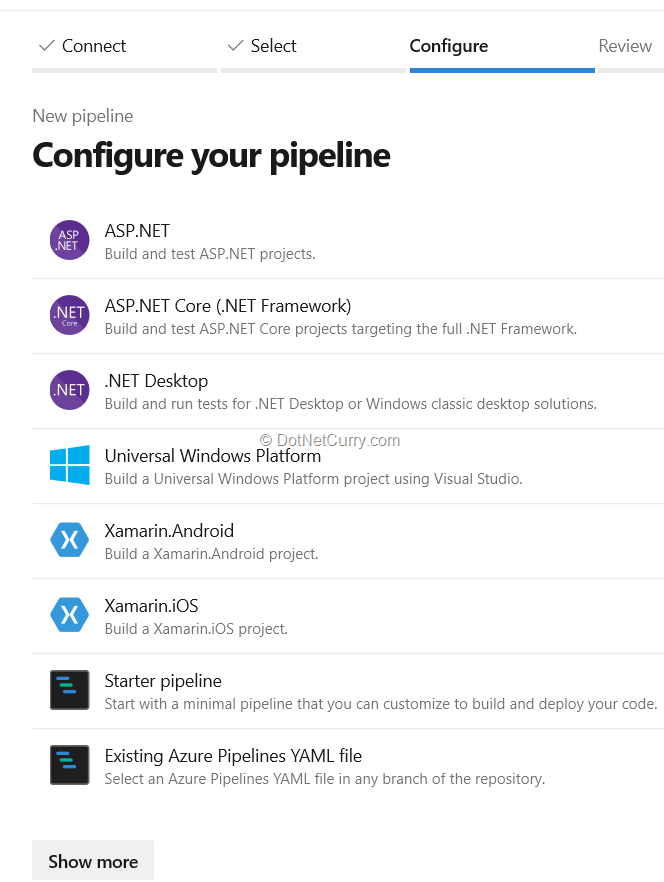
Figure 5: Build Pipelines suggest ASP.NET template based on repository
After selecting the template, we can save the yml (the extension for YAML is .yml) file and trigger build. The created.yml files will look as follows depending upon if they are for Ant or for ASP.NET.
YAML code for Ant
# Ant
# Build your Java projects and run tests with Apache Ant.
# Add steps that save build artifacts and more:
# https://docs.microsoft.com/azure/devops/pipelines/languages/java

trigger:
- master

pool:
  vmImage: 'ubuntu-latest'

steps:
- task: Ant@1
  inputs:
    workingDirectory: ''
    buildFile: 'build.xml'
    javaHomeOption: 'JDKVersion'
    jdkVersionOption: '1.8'
    jdkArchitectureOption: 'x64'
    publishJUnitResults: false
    testResultsFiles: '**/TEST-*.xml'
Observe that the task of ant is added and is referring to build.xml. You can change the inputs if required.
Pipeline for VS Build
# ASP.NET
# Build and test ASP.NET projects.
# Add steps that publish symbols, save build artifacts, deploy, and more:
# https://docs.microsoft.com/azure/devops/pipelines/apps/aspnet/build-aspnet-4

trigger:
- master

pool:
  vmImage: 'windows-latest'

variables:
  solution: '**/*.sln'
  buildPlatform: 'Any CPU'
  buildConfiguration: 'Release'

steps:
- task: NuGetToolInstaller@0

- task: NuGetCommand@2
  inputs:
    restoreSolution: '$(solution)'

- task: VSBuild@1
  inputs:
    solution: '$(solution)'
    msbuildArgs: '/p:DeployOnBuild=true /p:WebPublishMethod=Package /p:PackageAsSingleFile=true /p:SkipInvalidConfigurations=true /p:PackageLocation="$(build.artifactStagingDirectory)"'
    platform: '$(buildPlatform)'
    configuration: '$(buildConfiguration)'

- task: VSTest@2
  inputs:
    platform: '$(buildPlatform)'
    configuration: '$(buildConfiguration)'
The VSBuild task is very similar to working with classic editor (it creates a single zip file as it is referring to web application).
The YAML file has a schema based on the following structure.
YAML schema for build pipelines

The schema shows that we can add as many stages as required in the Pipelines, and also as many jobs as well. Each job can have many steps. The steps in turn can have various tasks.
Observe that there are NuGet package related tasks along with build and test tasks. You can also see the pool name is dependent on it if we are using hosted agent or default agent. If there is a single job, we do not have to specifically mention it.
Deploy to Azure Web App Service with Release Definition
Let us add a release definition and deploy the web application to Azure Web App Service.
Select New Pipeline from Releases tab and select the template for App Service Deployment. You need to have Web App Service in Azure to deploy our app to. You can create a new web app service by signing in to Azure Portal. Use this link to learn more.
For our deployment to be successful, we need to publish the artefacts created in Build. Let us add a task to YAML file to publish artefacts at the end.
Edit the build definition, go to the end of YAML file, search for Publish build artefacts and click on Add. The task can be seen as follows:
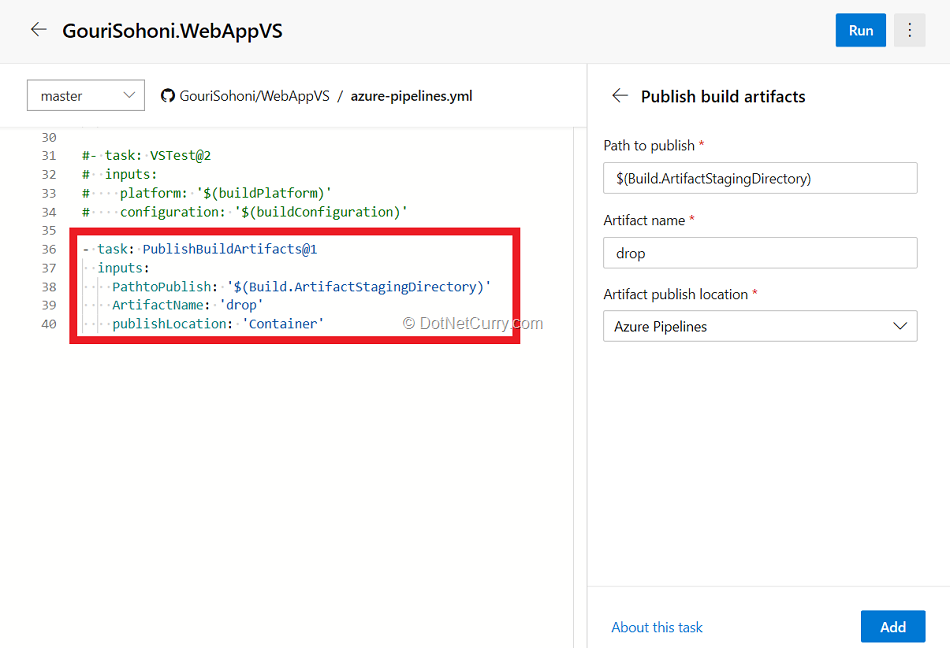
Figure 6: Customize YAML with a task
Save the build and execute it so that the artefacts can be published and used for our release.
Configure the task for Azure App Service in Release Definition
For any release definition we need to provide the build from where the artefacts will be fetched.
Configure the task for app service. Authorize the task to use the service created with your azure subscription. Although YAML for release pipeline is not yet commonly used, it is certainly possible and has recently got added to Azure DevOps.
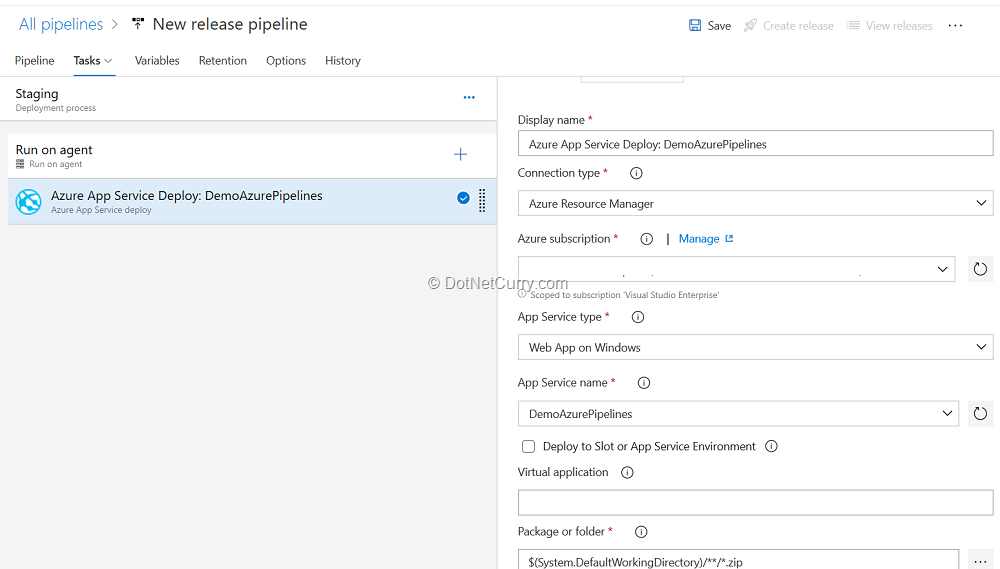
Figure 7: Create Release Definition
Save the release definition and create a release. After successful deployment, you should be able to see the application deployed.
Automated CI and CD
Edit the build definition to enable continuous integration trigger and also enable the trigger for continuous deployment. To enable, click on the ellipse button and select Triggers.
Save the pipeline.
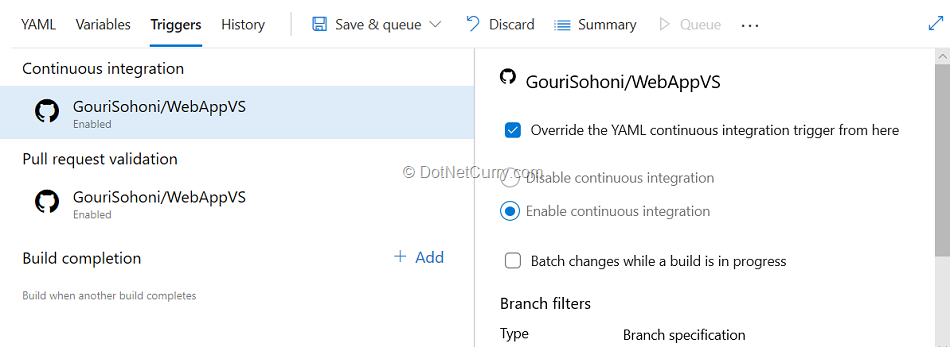
Figure 8: Enable Continuous Trigger
Enable and save the trigger for release definition. Change the code in GitHub and ensure that both the triggers work as expected.
Customize your build pipeline
You can add or modify existing tasks from the build pipeline if required. For example, you can add variable(s), add multiple pool and jobs in it. I will show you how to add a variable and a PowerShell script task. Let us add a variable named UserName in the yml file.
We can also select the task of PowerShell, do the required configuration and click on Add.
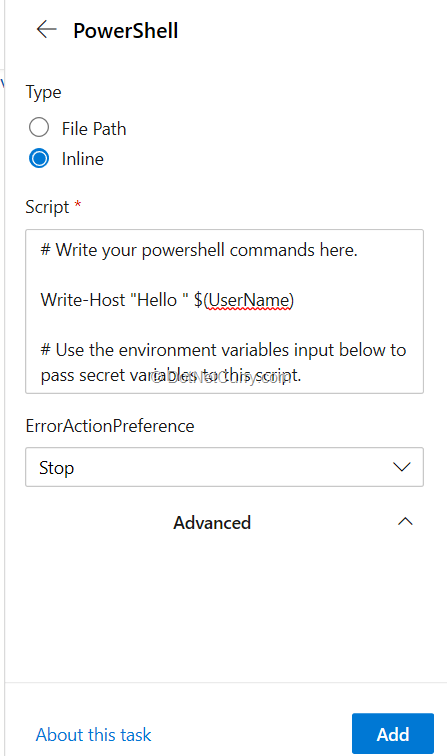
Figure 9: Add PowerShell Script to YAML
The code in yml for variable declaration and task looks as follows:
variables:
  solution: '**/*.sln'
  buildPlatform: 'Any CPU'
  buildConfiguration: 'Release'
  UserName: 'Gouri Sohoni'
  configuration: debug
  platform: x64
……..
- task: PowerShell@2
  inputs:
    targetType: 'inline'
    script: '# Write your powershell commands here.

      Write-Host "Hello " $(UserName)

      # Use the environment variables input below to pass secret variables to this script.'
Note: When you create the .yml file, it automatically gets added to the Source Code.
Create Azure Pipelines for Azure DevOps Team Project
Let us create a build pipeline for the Azure DevOps project.
We just have to specify that the source is from Azure DevOps repository and the wizard will show you the template to choose. In this case, I am going to work with only the .csproj and not the whole solution. In order to achieve this, I will have to customize the yml file. When we select .sln file to build, it selects all the projects which are part of the solution which may not be required in some cases. If we just want to create a build for a single project (which is a part of solution), we need to change the .sln to .csproj (or .vbproj if we are working in VB.Net).
- task: VSBuild@1
  inputs:
    solution: Solution1/UnitTestProject1/UnitTestProject1.csproj
    msbuildArgs: '/p:OutputPath="$(build.artifactstagingdirectory)\\"'
    platform: '$(BuildPlatform)'
    configuration: '$(BuildConfiguration)'
I want to copy the artefacts to a local shared folder. In order to do that, I will have to change the pool from hosted to the default pool. For this, I need to first create PAT (Personal Access Token), download and configure the agent pool. It will be done as follows:
pool:
  name:
The name should be the same as the agent you have configured. To know more on how to download and configure the agent, follow this link.
For copy task to be successful, I created a shared folder on the machine on which I have my agent configured and pool created, and provided the copy file task as follows:
- task: CopyFiles@2
  inputs:
    SourceFolder: '$(Build.ArtifactStagingDirectory)'
    Contents: '**/*.dll'
    TargetFolder: '\\\'
Ensure that the artefacts are published to the ArtifactStagingDirectory for the copy to be successful. After successful creation of the build, I found the artefacts in the shared location. Customizing your YAML file is thus very easy and straightforward.
It is very easy to create YAML from any existing classic editor build, you just have to Edit the existing build, select the agent and click on View YAML as shown in Figure 10.
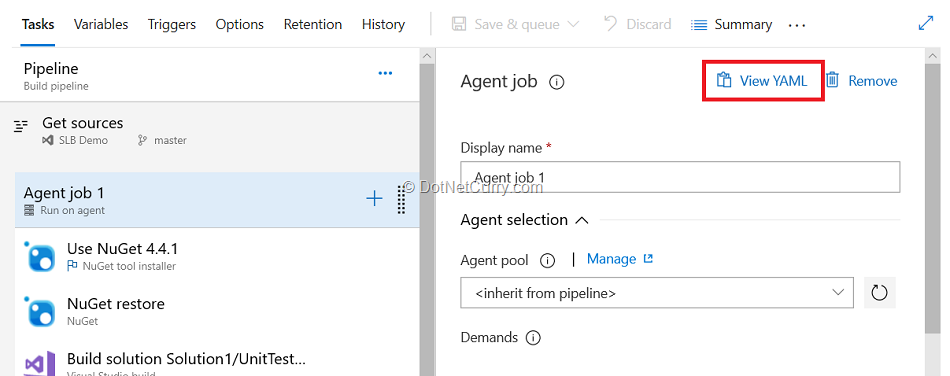
Figure 10: Create YAML from classic editor
Conclusion:
In this article, we have seen how to get started with the creation of Azure Pipelines. I showed how to fetch code from GitHub repository and create a build pipeline with yml followed by release pipeline. We also discussed how the source code can be Azure DevOps and how customization can be handled for yml.
This article was technically reviewed by Subodh Sohoni.
This article has been editorially reviewed by Suprotim Agarwal.
C# and .NET have been around for a very long time, but their constant growth means there’s always more to learn.
We at DotNetCurry are very excited to announce The Absolutely Awesome Book on C# and .NET. This is a 500 pages concise technical eBook available in PDF, ePub (iPad), and Mobi (Kindle).
Organized around concepts, this Book aims to provide a concise, yet solid foundation in C# and .NET, covering C# 6.0, C# 7.0 and .NET Core, with chapters on the latest .NET Core 3.0, .NET Standard and C# 8.0 (final release) too. Use these concepts to deepen your existing knowledge of C# and .NET, to have a solid grasp of the latest in C# and .NET OR to crack your next .NET Interview.
Click here to Explore the Table of Contents or Download Sample Chapters!
Was this article worth reading? Share it with fellow developers too. Thanks!
Gouri Sohoni is a Trainer and Consultant for over two decades. She specializes in Visual Studio - Application Lifecycle Management (ALM) and Team Foundation Server (TFS). She is a Microsoft MVP in VS ALM, MCSD (VS ALM) and has conducted several corporate trainings and consulting assignments. She has also created various products that extend the capability of Team Foundation Server.